


THIS SUPER EASY DESIGN is a really cute way of bringing the summer vibe into your jewellery. It looks lovely wrapped around your wrist as a bracelet or it can be worn as a necklace. I gave one to my friend and she even used it in her hair! It was sweet. Here's how you can make one, it costs next to nothing but it does take a bit of time let me warn you!

WHAT YOU WILL NEED:
Monofilament cord
Yellow seed beads
White seed beads
Scissors
Step 1: Tie a knot at one end of the cord to ensure the beads you thread don't go falling off, then thread about 10 yellow beads onto it.
Step 2: Thread 8 white beads on your cord and direct the end of the cord back through the white beads so you're making a loop. Hopefully the pictures below help to illustrate what I'm saying ;)

Step 3: Now you should be able to pull the end very tight, whilst keeping the white beads immediately next to the yellow ones by pinching them together. If you don't do this then the white beads will form a little loop half way up the cord...not good! You should now be looking at something like this:

Yes? Sweet, onto...
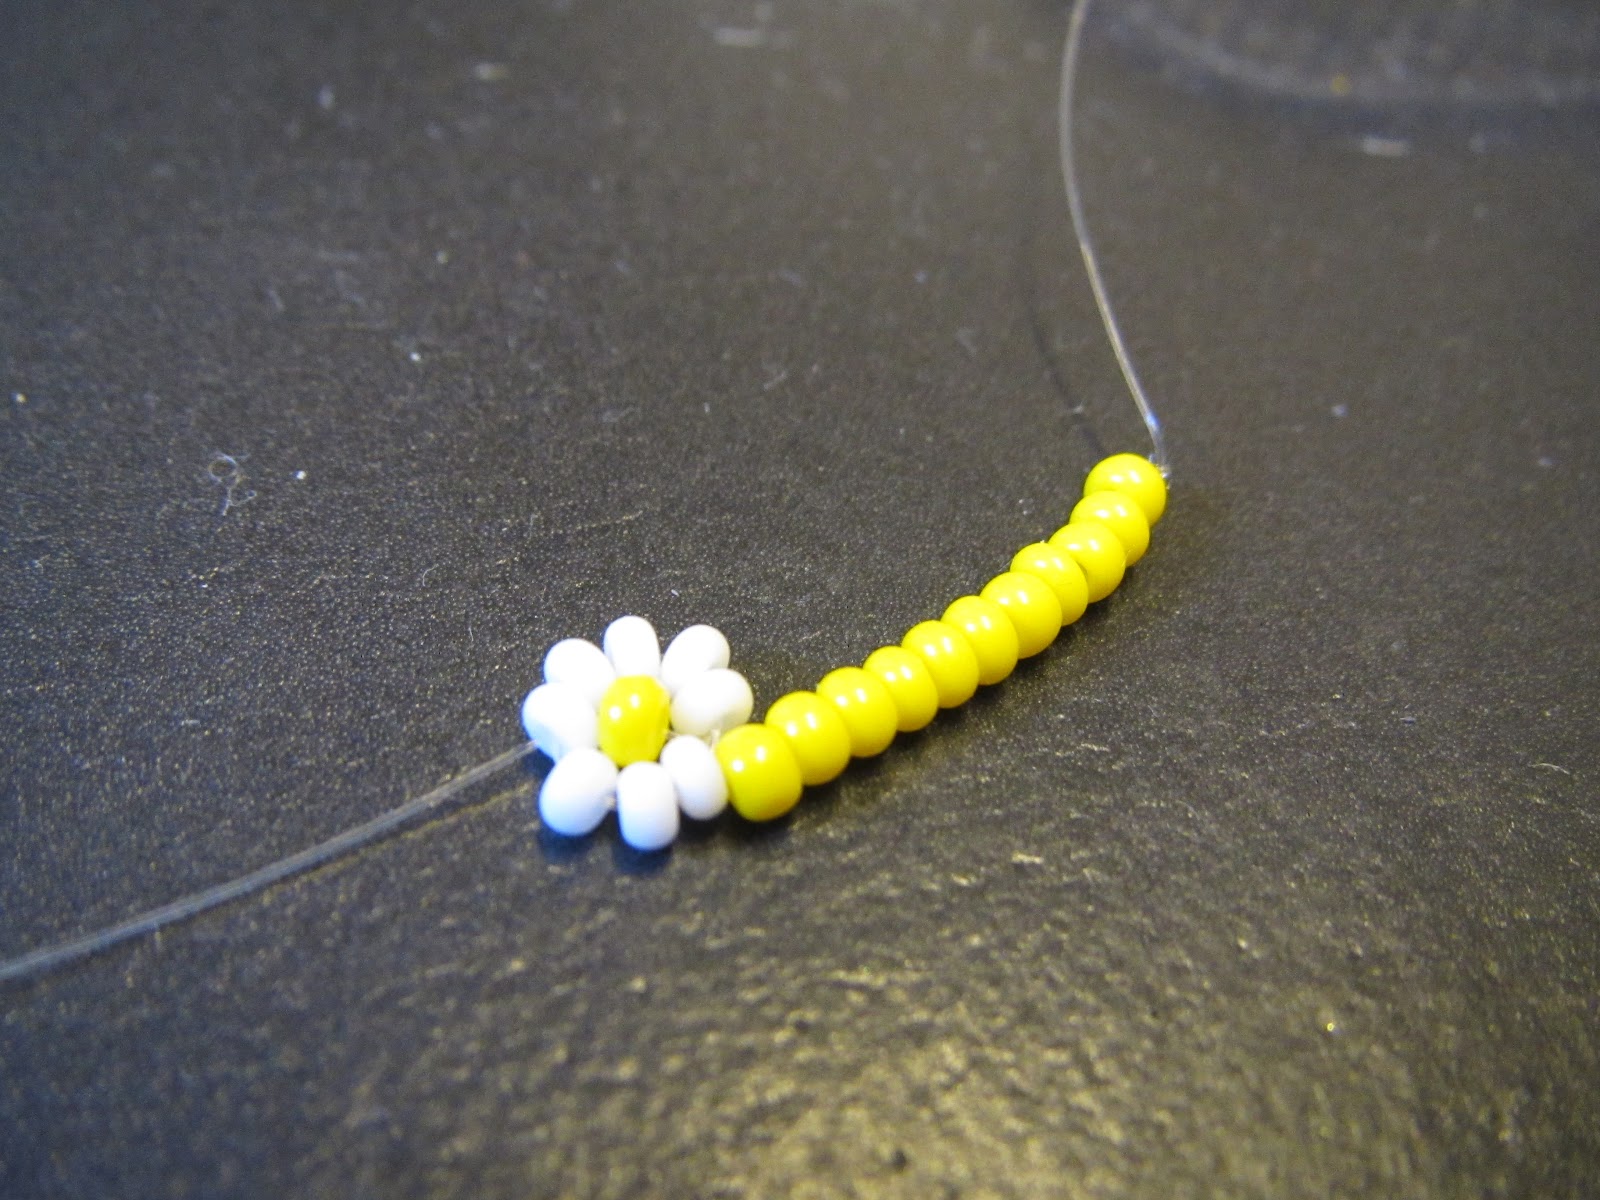
Step 4: This next step requires you to thread a single yellow bead on and then take the end of the cord through the white bead on the top of the little loop. Reading that makes me realise this doesn't make much sense but look at the photo carefully and it should come together!

Step 5: Pull the cord tight again and the yellow bead should fit snugly into place in the middle of the white bead loop. Repeat steps 1-5 until your daisy chain is as long as you like. Hope you enjoy!


This is such a perfect idea that I am dying to try! I think I will buy some beads haha :). You have explained it really well too! Thanks!
ReplyDeletehttp://beckyleight.blogspot.co.uk
xxx
Aw thank you, and thank you very much for subscribing, it means a lot :) I will check out your blog now! xx
DeleteSo adorable!! i tried this and the pictures for the tutorial are really helpful. Thanks so much!
ReplyDelete<3 ,
Mimi